Performing a Rail Inspection
This guide walks through recording a full crane rail inspection in the RailMonitor app, from starting the inspection to submitting an inspection point.
1. Start a new inspection
From the Dashboard, tap + Start New Inspection.
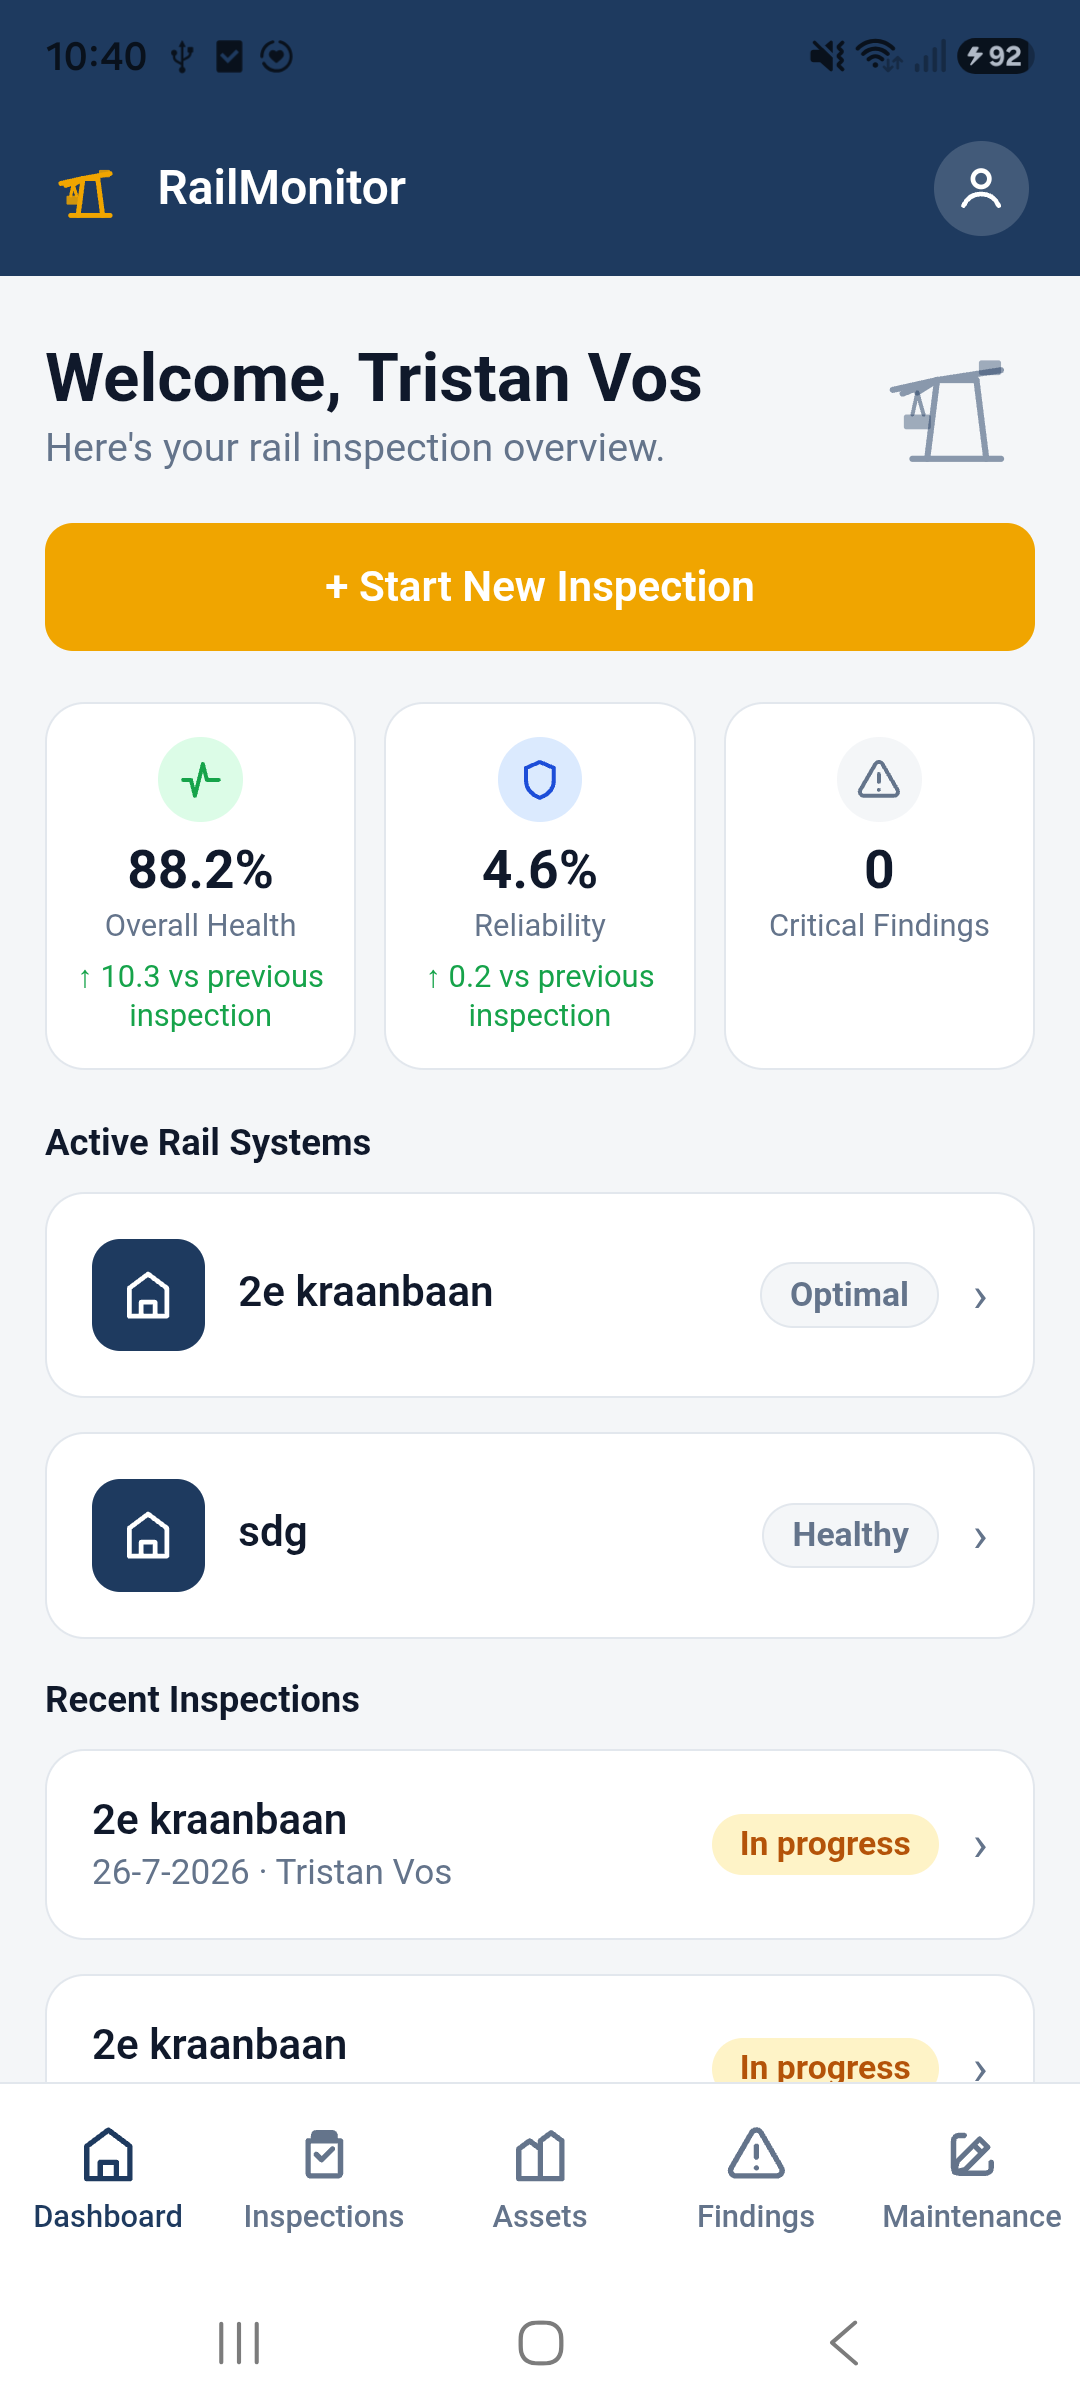
If a rail system already has an inspection in progress, you can also tap that rail system on the Dashboard and use + Add inspection point from its page — this resumes the same in-progress inspection instead of starting a new one.
2. Set up the inspection
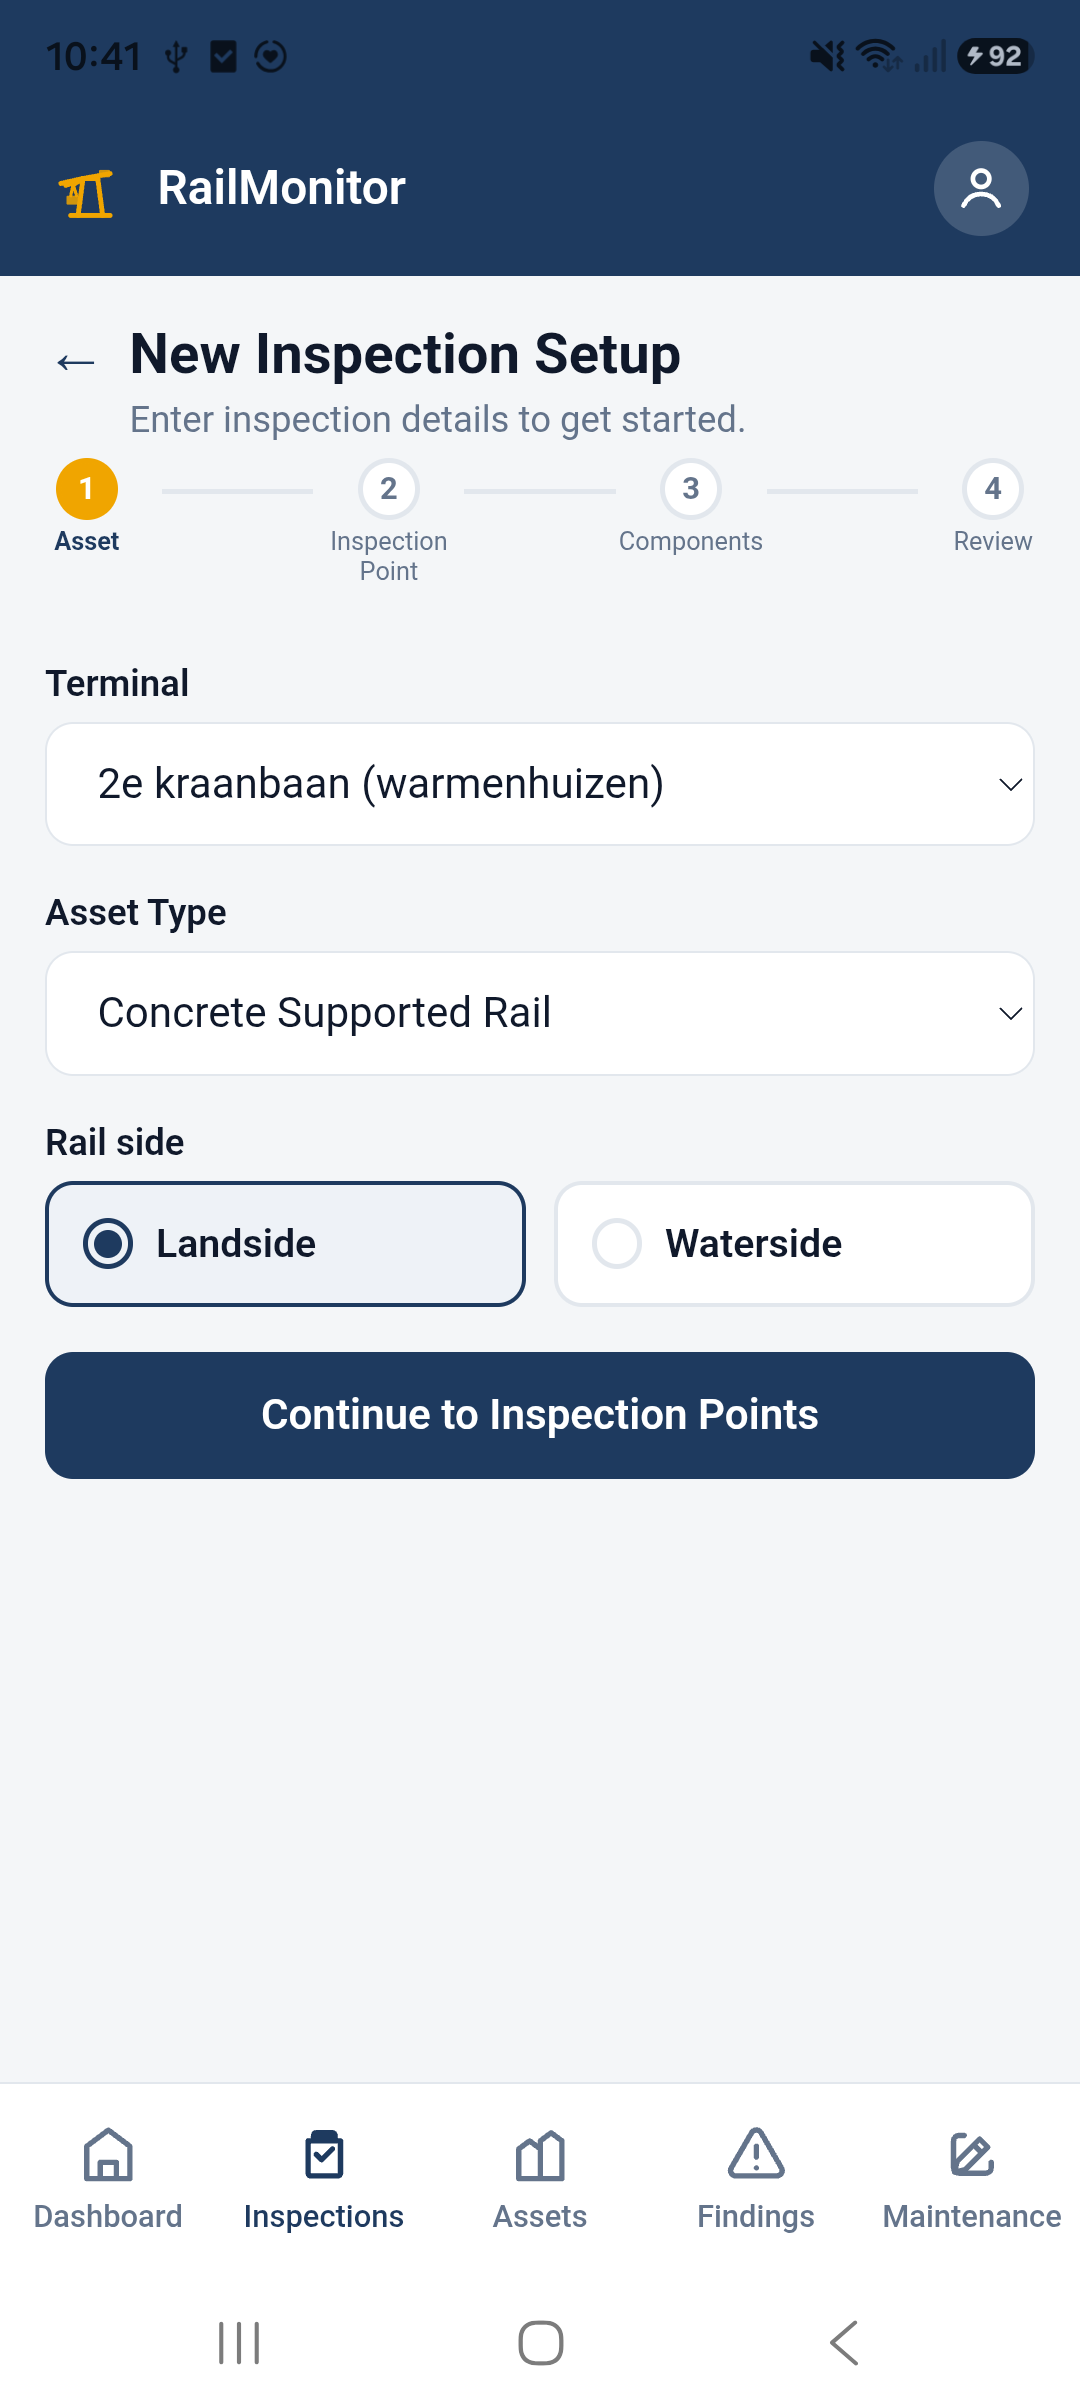
Choose the Terminal (rail system), the Asset Type, and which Rail side you're inspecting (Landside or Waterside), then tap Continue to Inspection Points.
3. The rail system overview
This shows the rail system's map, every inspection point recorded so far, and lets you add new ones. This is also where you'll finish the whole inspection once every point along the rail has been recorded.
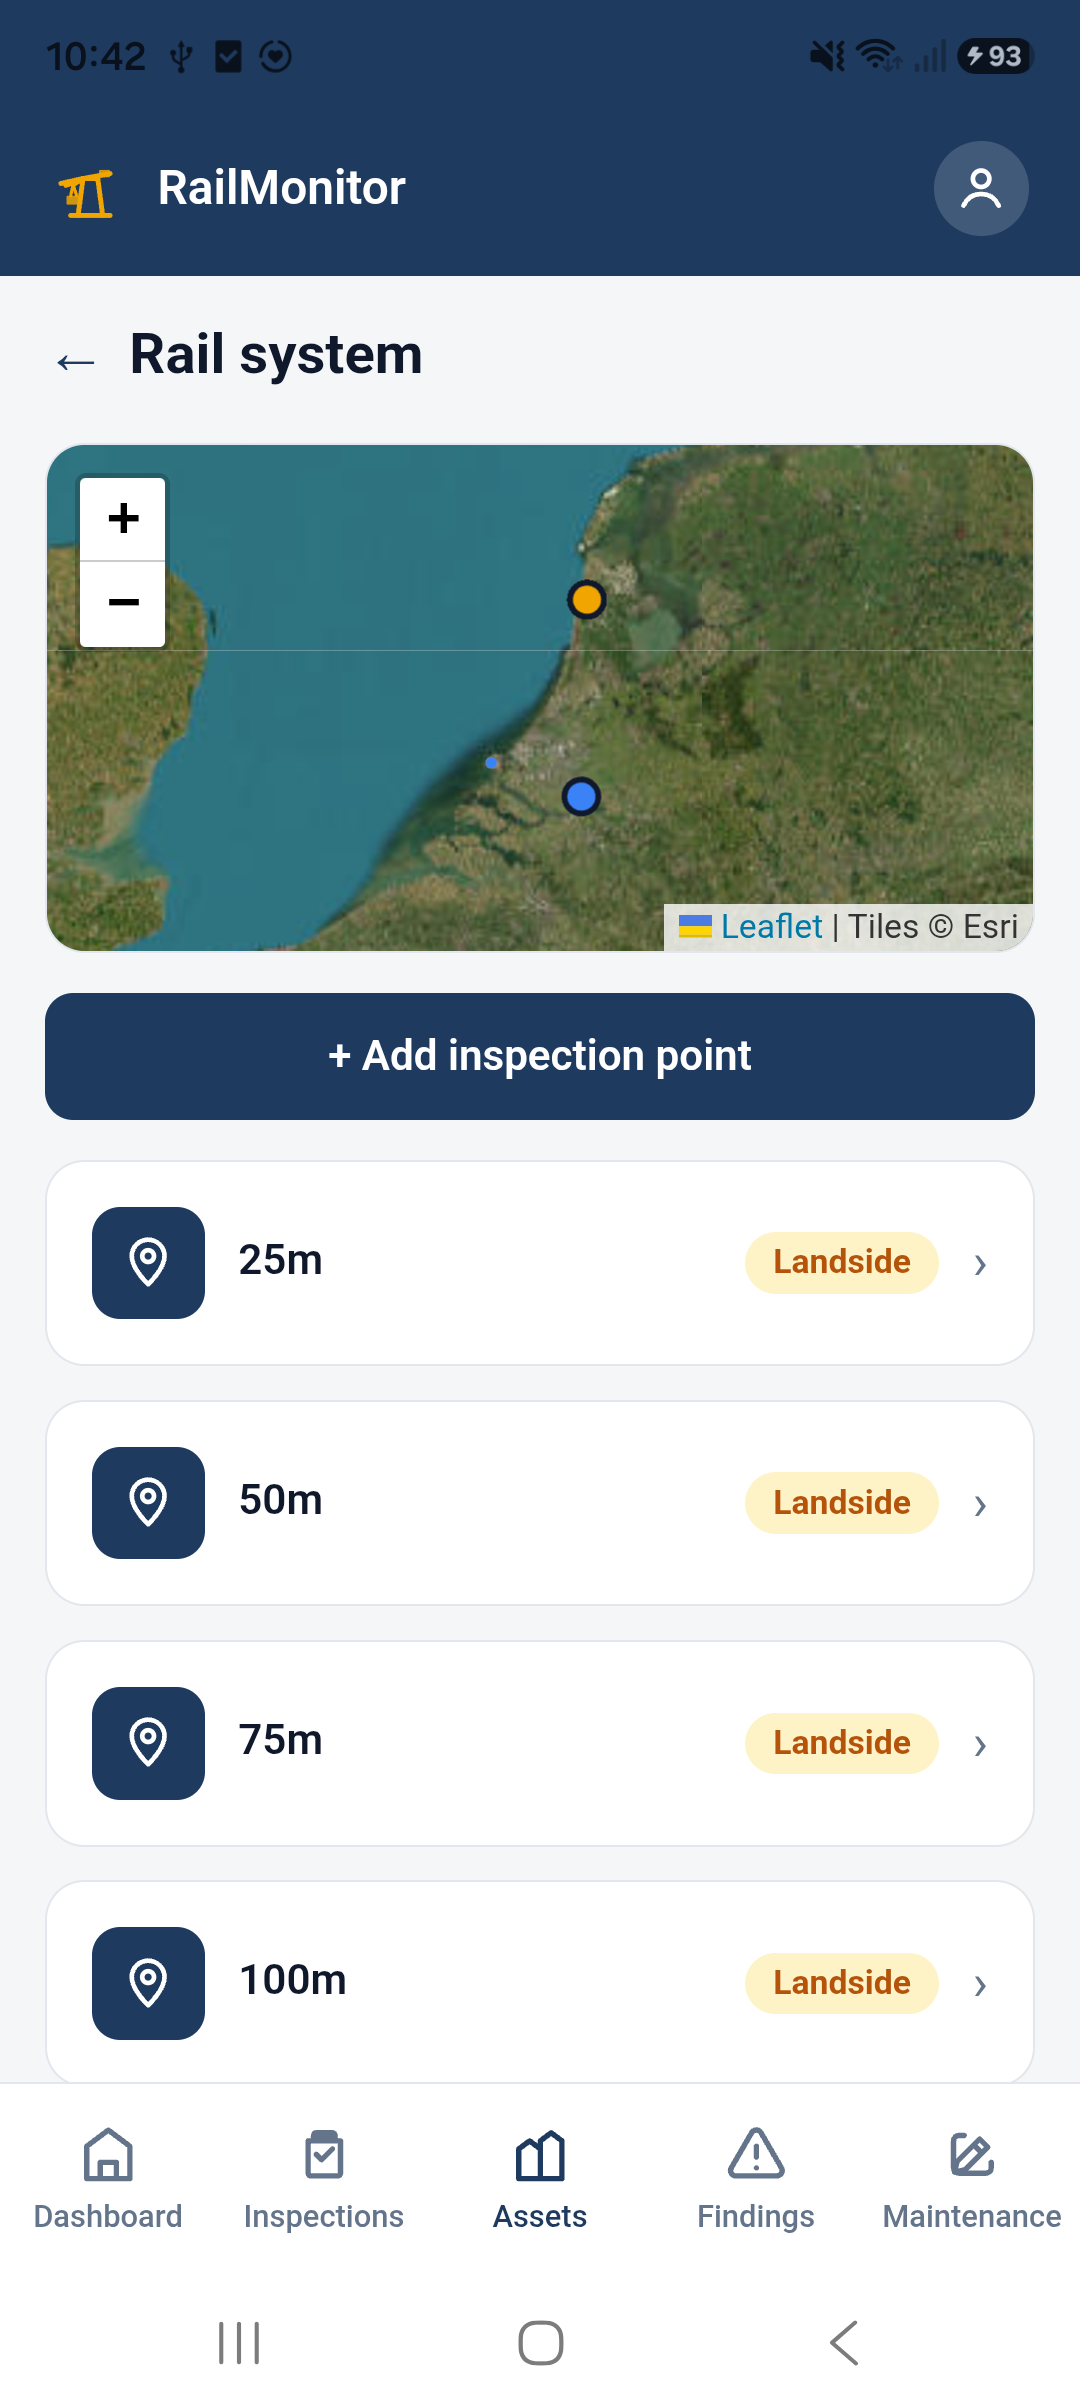
Tap + Add inspection point to record the next point.
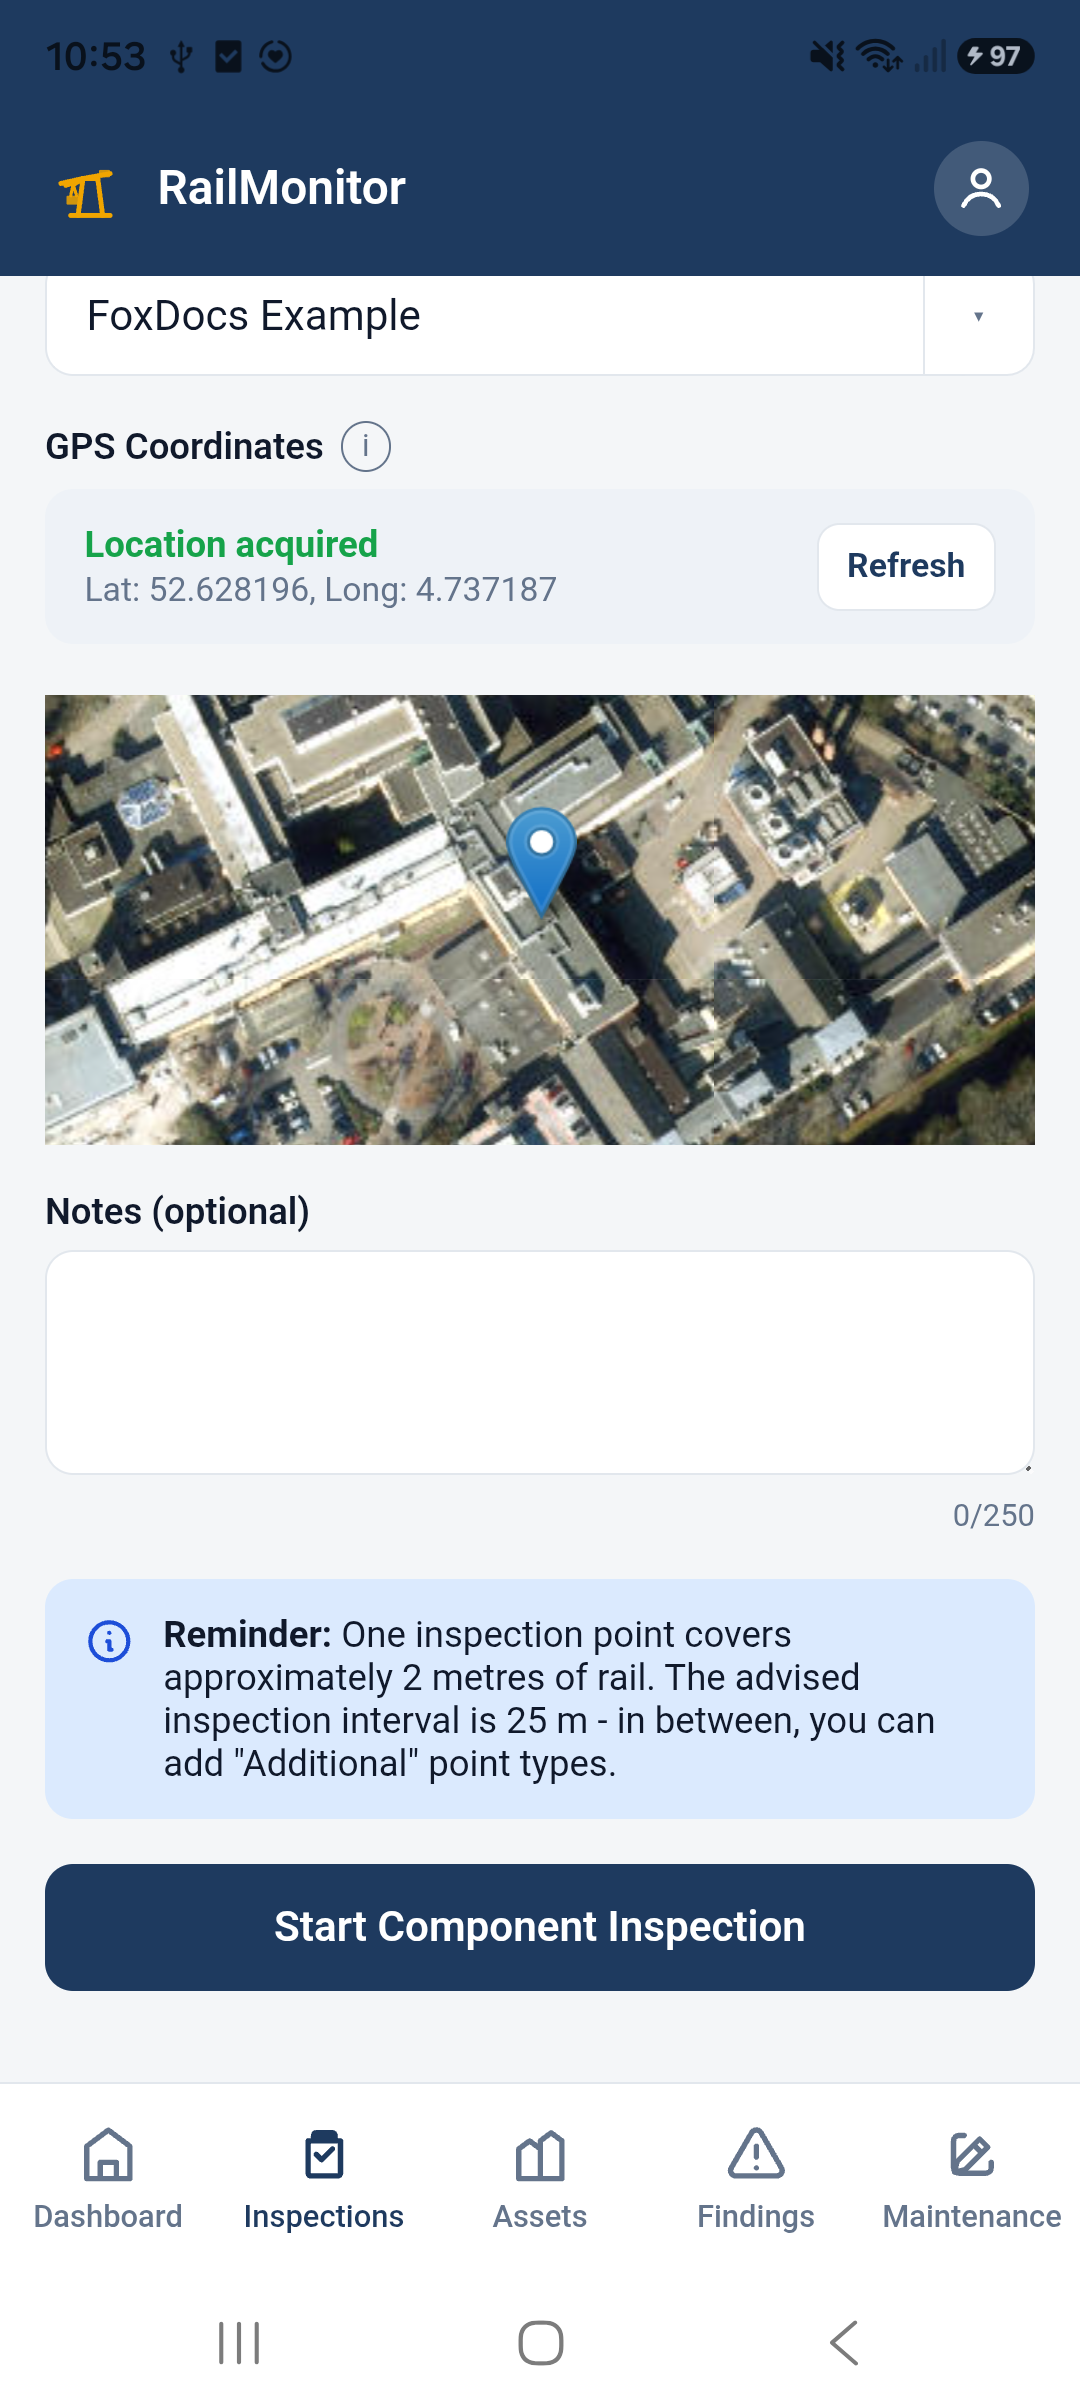
4. Add an inspection point
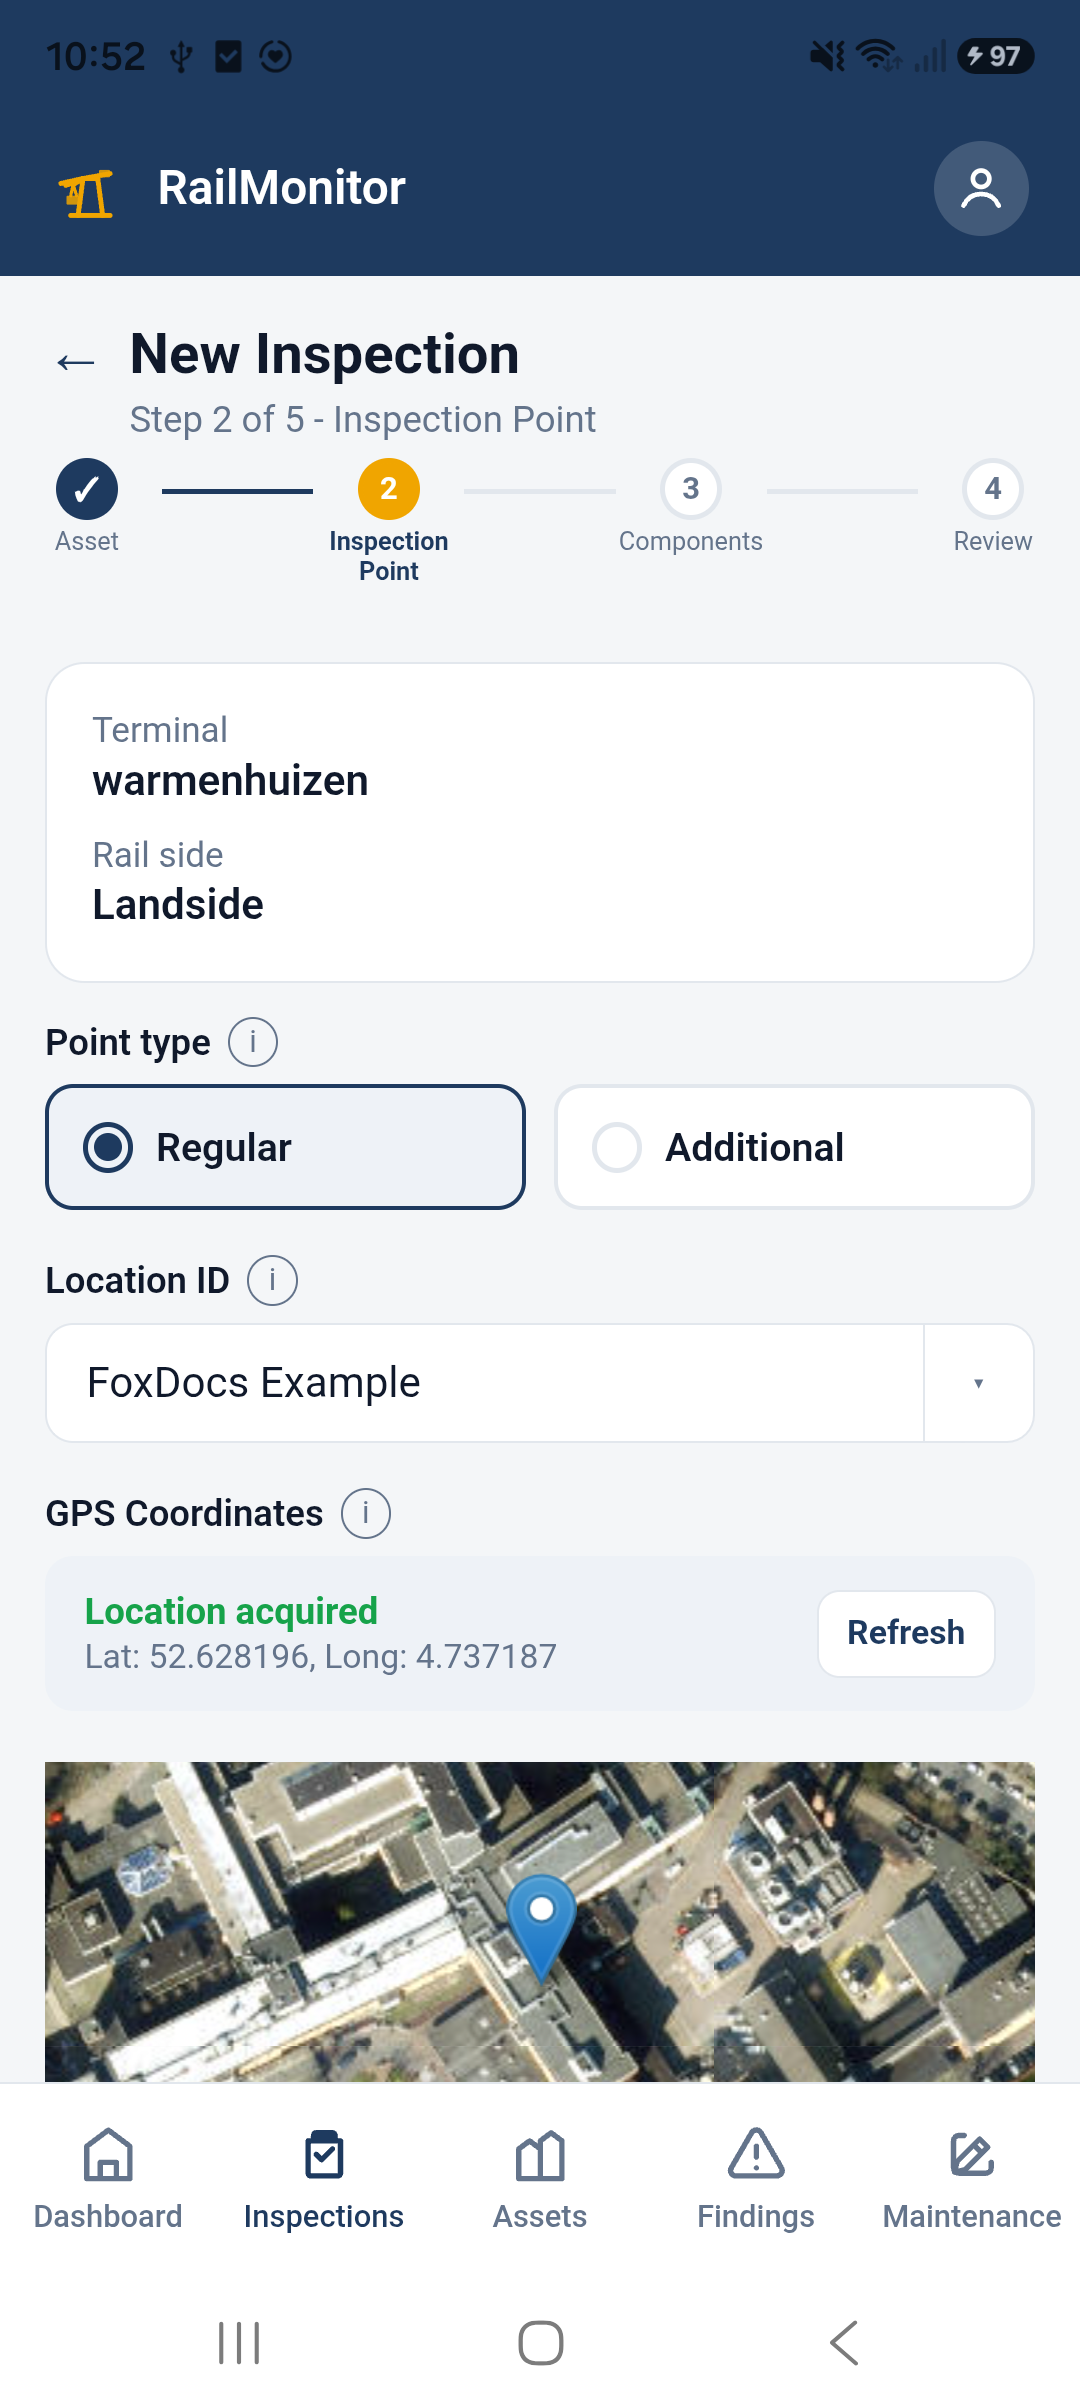
Fill in:
- Point type — Regular for the planned coverage, or Additional for an extra point you add on the spot (e.g. at a specific defect).
- Location ID — a short name for this exact spot, e.g. "Bollard 14" or "Chainage 250 m". You can pick an existing one or type a new one.
- GPS Coordinates — captured automatically. Tap Refresh if it doesn't pick up a fix right away.
- Notes (optional).
:::info Reminder One inspection point covers approximately 2 metres of rail. The advised inspection interval is 25 m — in between, you can add "Additional" point types. :::
Once a GPS fix is acquired, tap Start Component Inspection.
5. Assess each component
Every point lists the components that apply to the chosen asset type, marked Required or Optional, with their current status (Not inspected / Inspected / Not present).
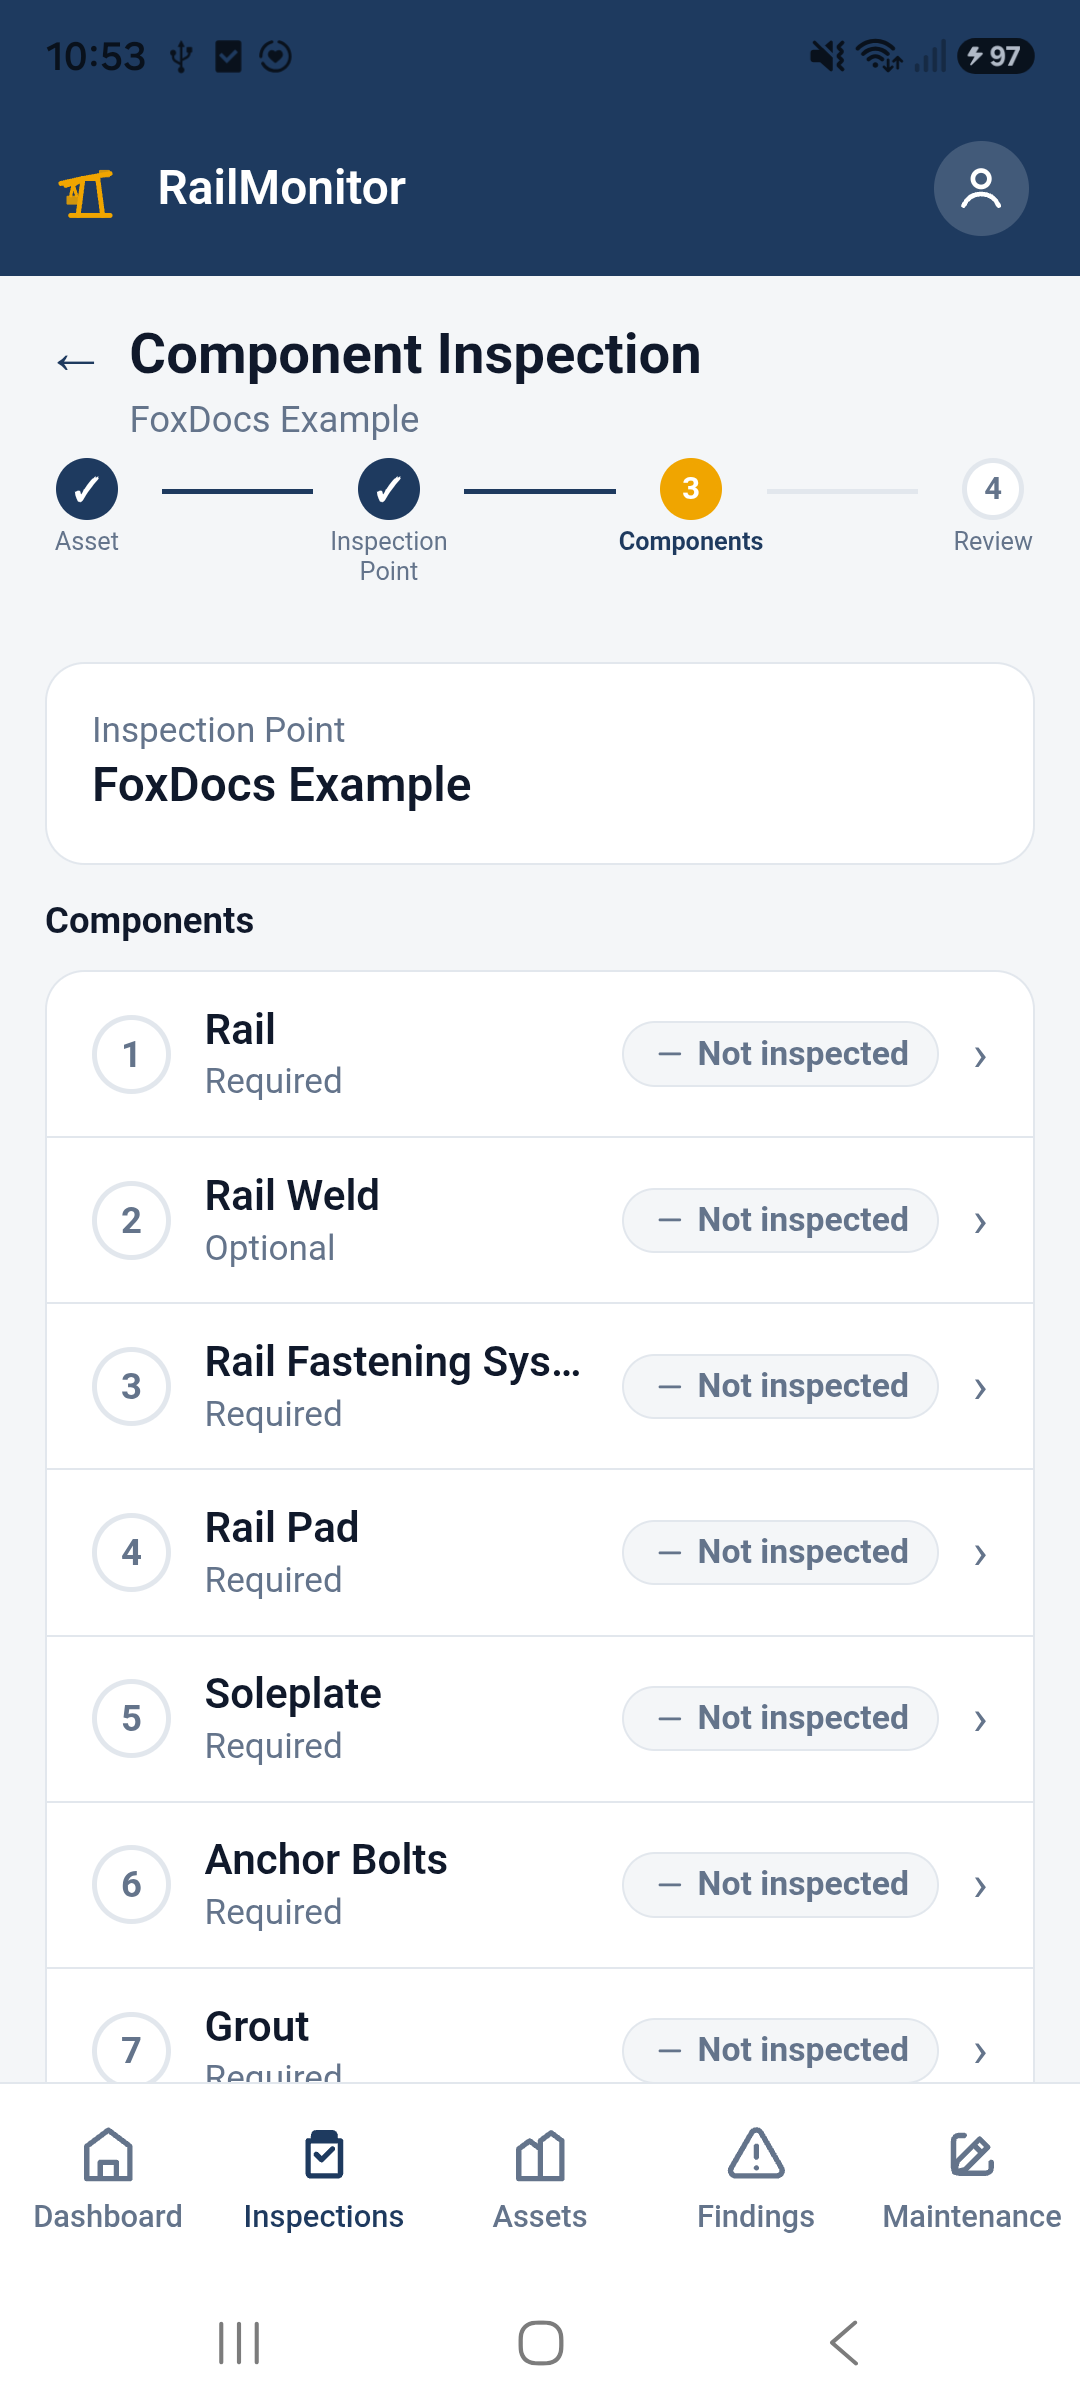
Tap a component to record its condition.
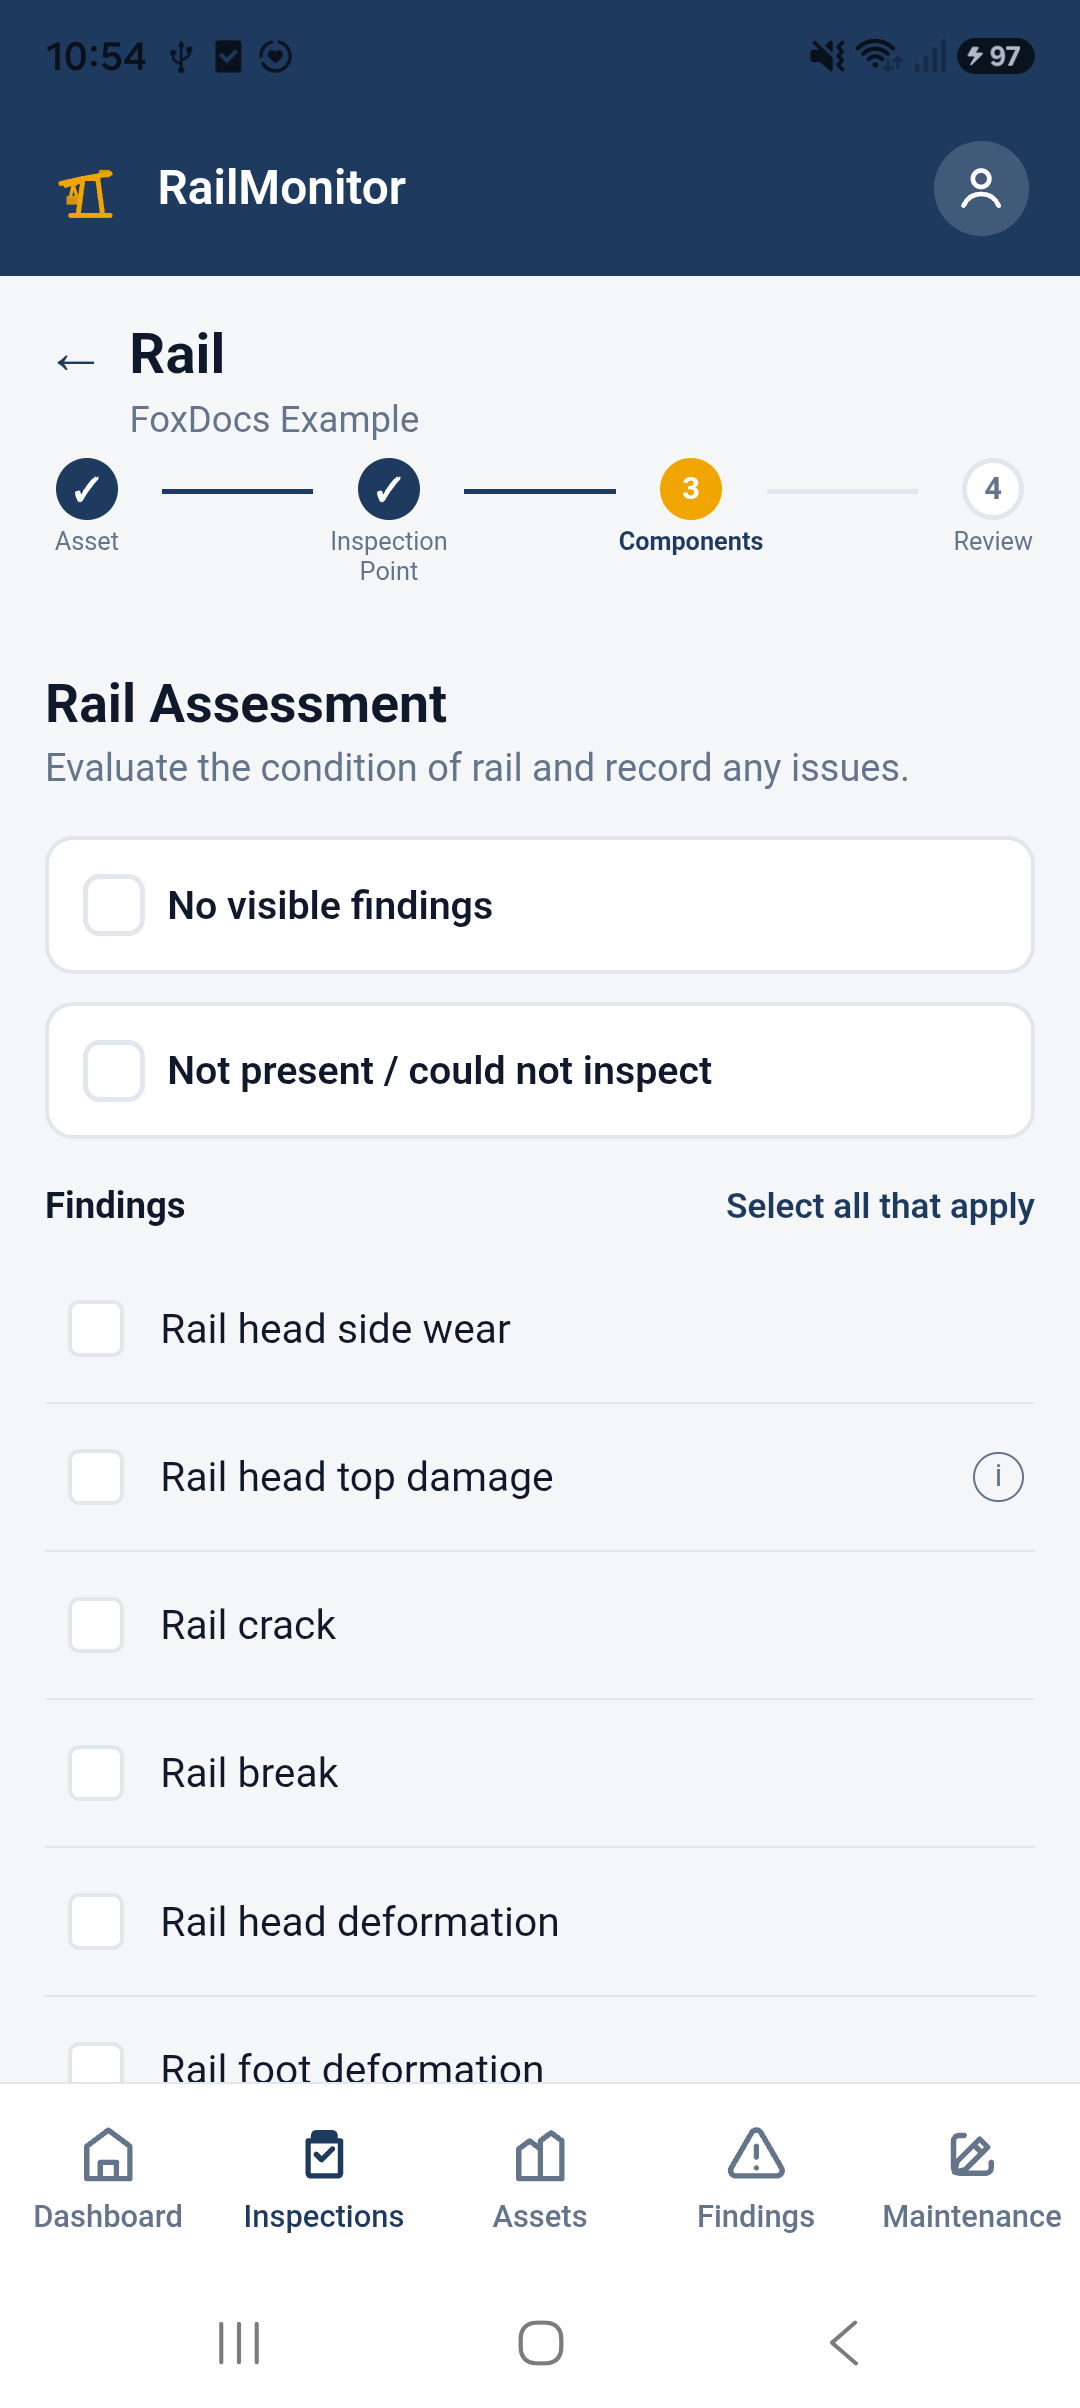
6. Recording a component assessment
For each component, choose one of:
- No visible findings — the component was checked and is in good condition.
- Not present / could not inspect — the component doesn't apply here, or couldn't be assessed.
- Or leave both unchecked and select one or more specific findings from the list below (use Select all that apply to check every applicable one). Depending on the finding, you may need to set its extent (Local / Several locations / Continuous) or a quantity.
You can also add Comments (up to 250 characters) and up to 5 Photos.
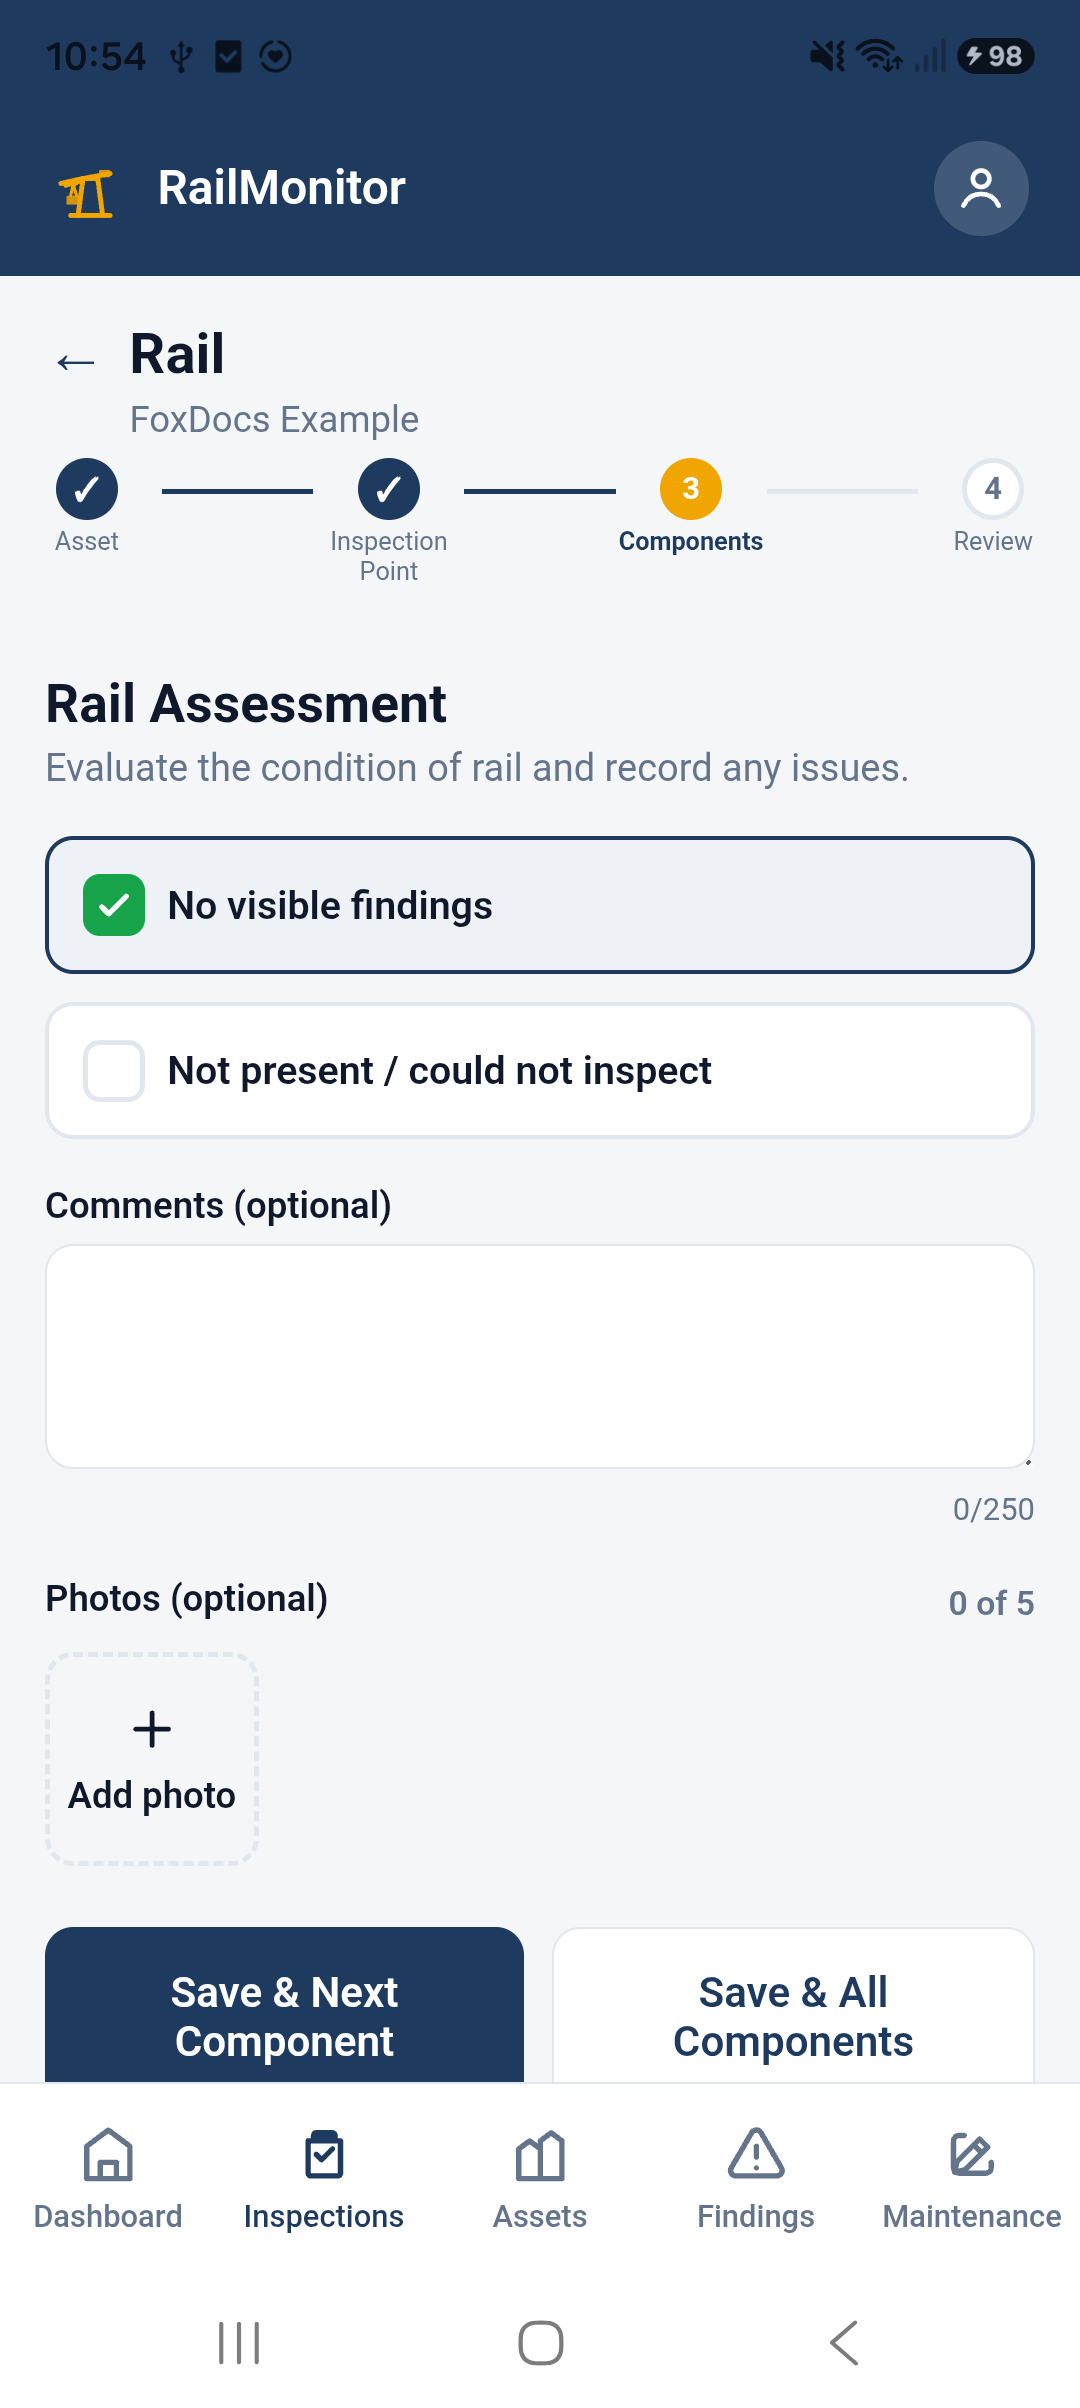
Tap Save & Next Component to move straight to the next one, or Save & All Components to return to the component list.
7. Finishing components
Back on the component list, an assessed component shows an Inspected pill. Once you've gone through every component that applies, scroll down and tap Finish components.
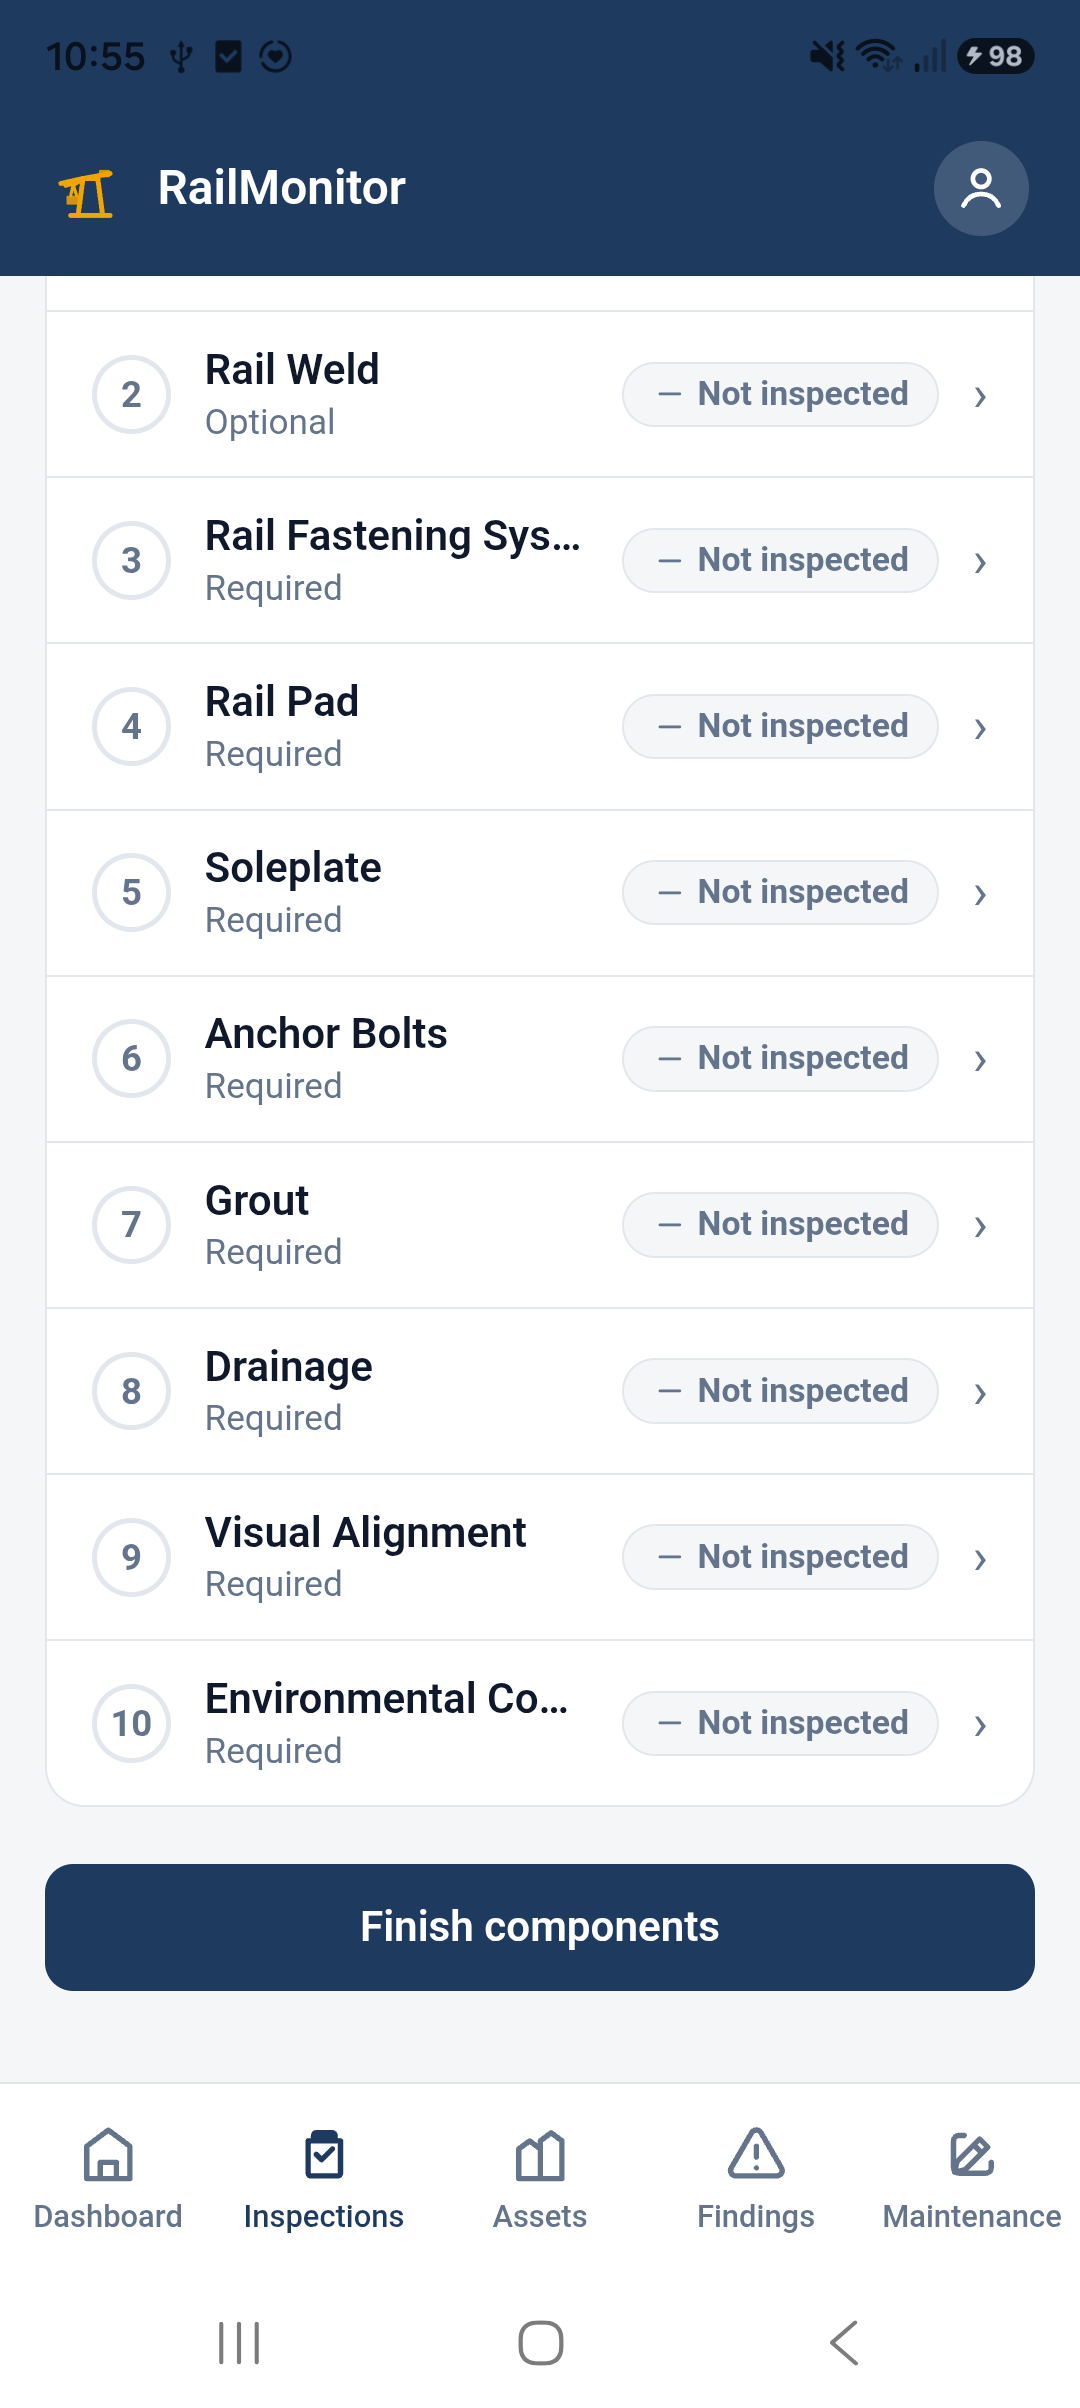
8. Review & submit
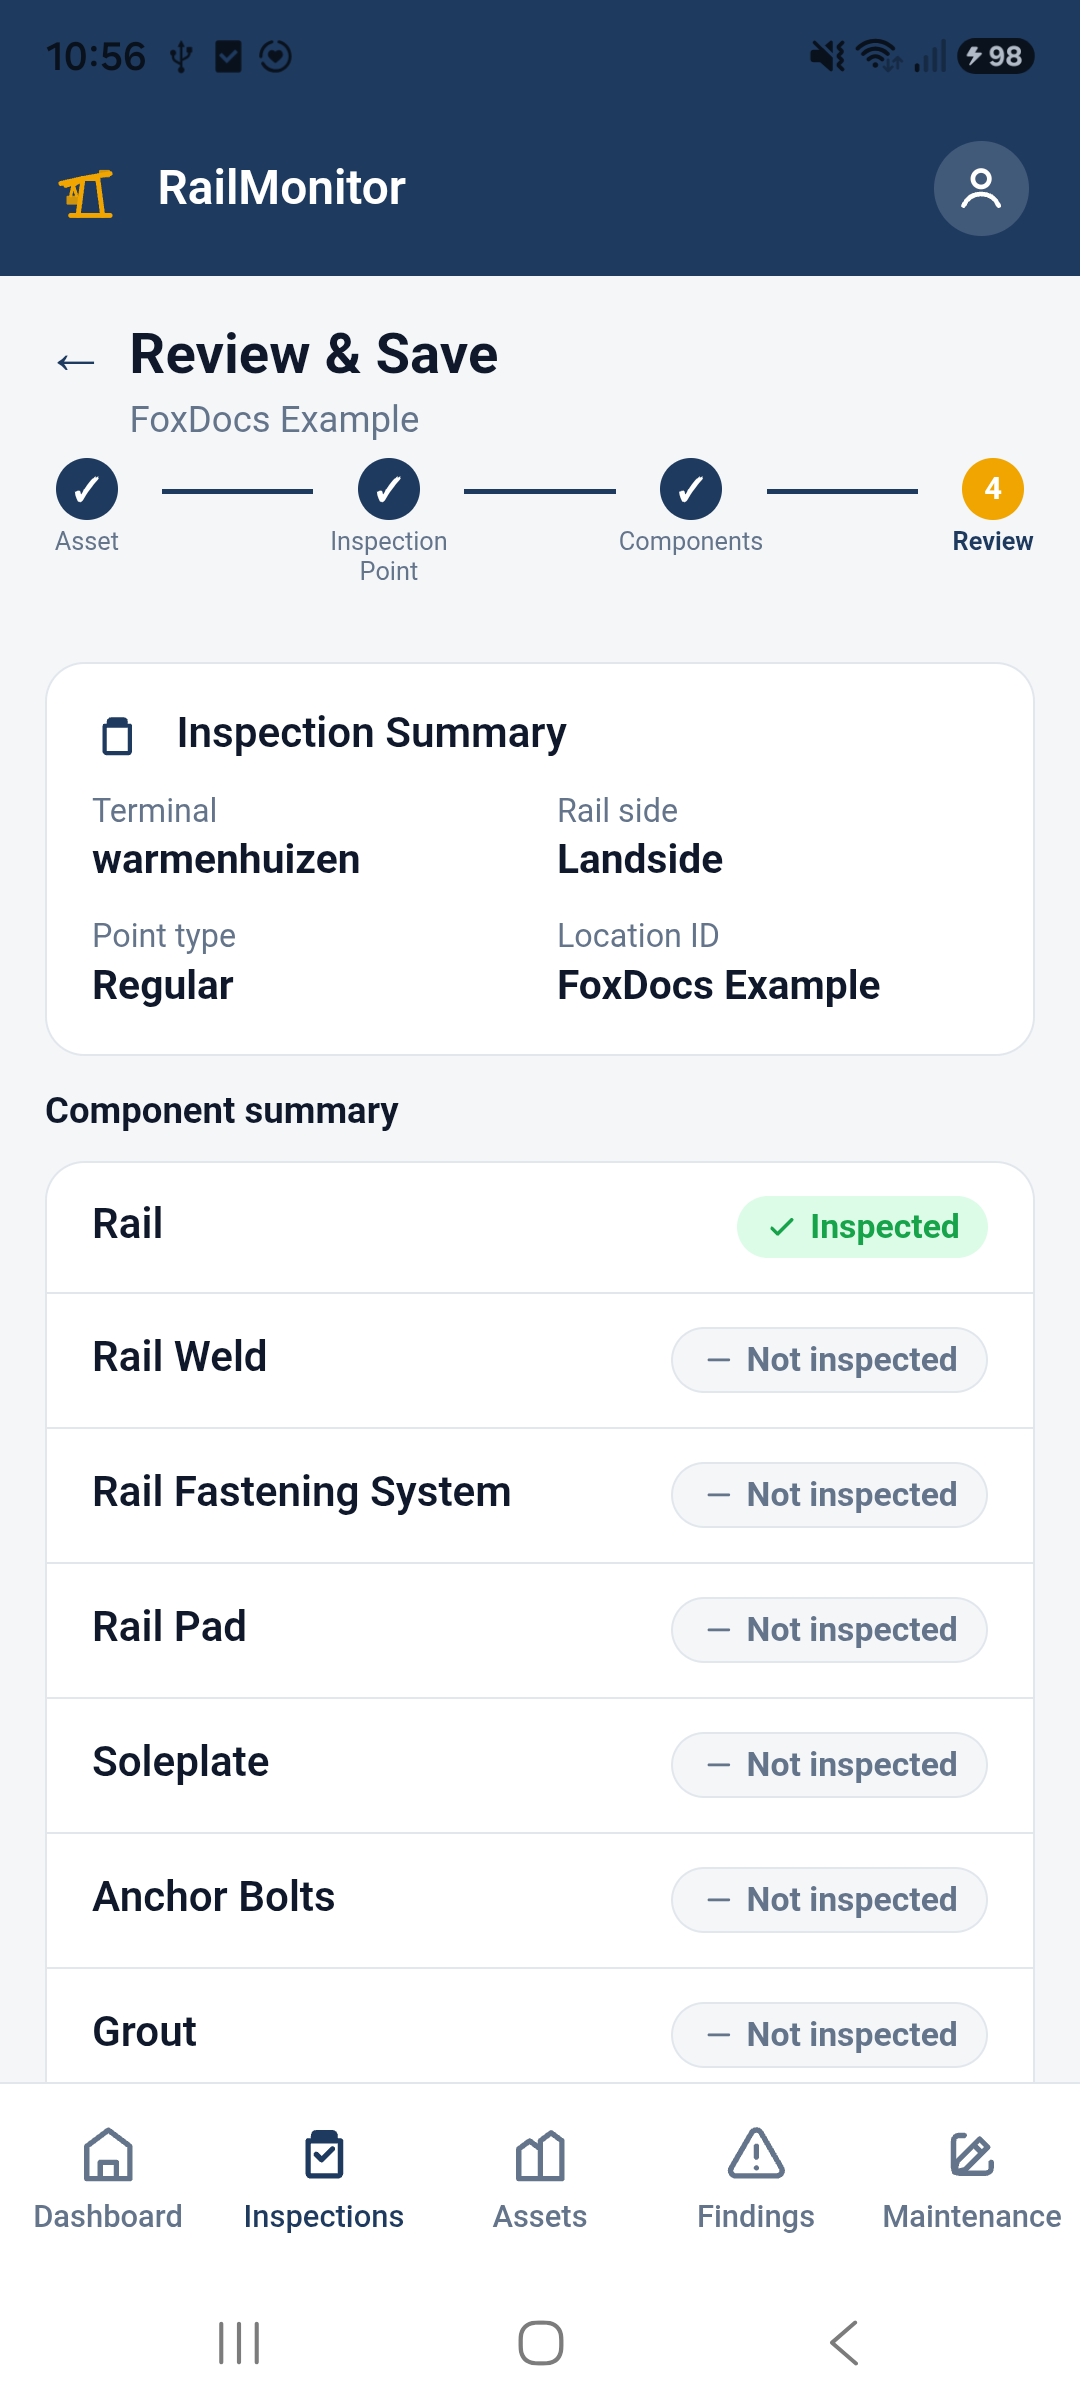
The Review & Save screen summarizes the inspection point and every component's status. Add any additional notes, then attach at least one photo of the inspection location — this is required before you can submit.
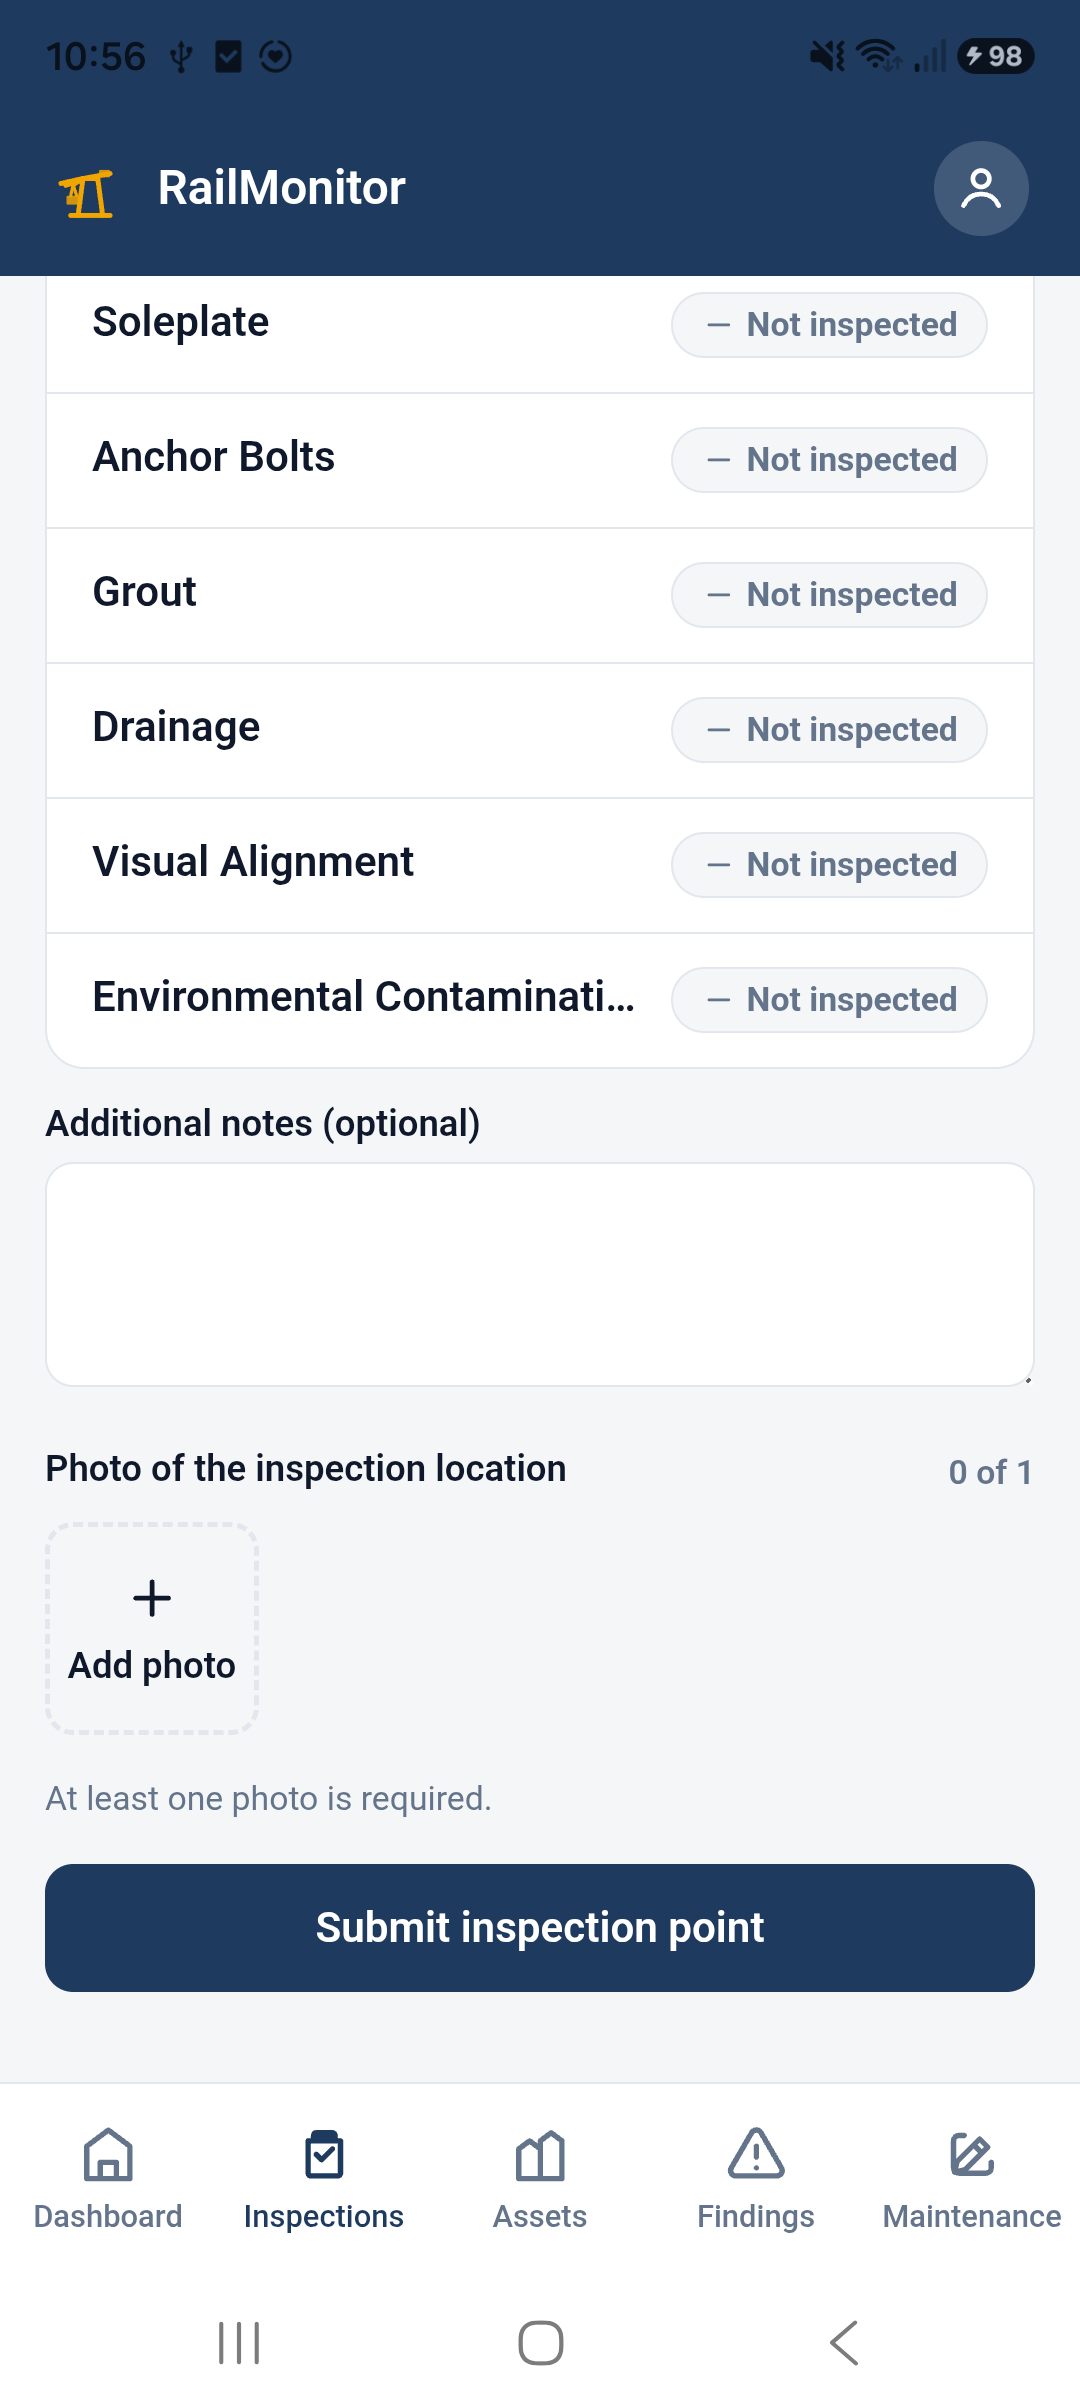
Tap Submit inspection point. You'll then be asked whether to add another inspection point or finish here.
An already-submitted point isn't locked — open it again from the rail system page and tap Edit to change your answers.
9. Finishing the whole inspection
Repeat steps 4–8 for every inspection point along the rail. Once every point has been recorded, go back to the rail system page and tap Finish inspection to mark the inspection as completed.